
How To Make 3D Copies of Ancient Pottery
- Feb 11, 2017
- 4 min read

Can't Take It With You
One of the bad things about excavating overseas is that very often you can't take the pottery with you. What do we do? We study the pieces in-depth while overseas and put everything together back home based on photographs, 3D scans, etc.
These vessels you see here are from Cabin 12 of Mokarta, Sicily (ca. 950BC). I've measured them, Munselled them, photographed them, 3D scanned them, and whatever else I could think of, but I still couldn't take them with me...until now.
Making the 3D Copies
As I sat looking through the 3D scans, I began to wonder how difficult it would be to actually print them with a 3D Printer. I've ran into a ton of problems along the way, but I think I've got the kinks worked out at this point, so I would like to show you my process in case someone else wants to give it a try. Below you will find the step-by-step process that I went through to make my copies.

STEP ONE: SCANNING
Of course, you will need a 3D scanner. If you don't have one for your excavations, you are really missing out. We 3D scan all publishable sherds, and sometimes even normal diagnostics if we can get to them. A 3D Scanner is vital to studying your vessels, sherds, and objects back hom.

STEP TWO: PRINTING
Obviously, you will also need a 3D printer. My university doesn't yet have one, but luckily the local library has a pretty good one. If you can find one (make sure it is high quality), then you can continue the process. The printer I use is small, so all of my vessels need to be printed in sections. The vessel you see here was printed in fours (only two pieces shown). Because of this, they need to be molded together. Make sure to use ABS plastic for printing. Check the link to find out what I use.
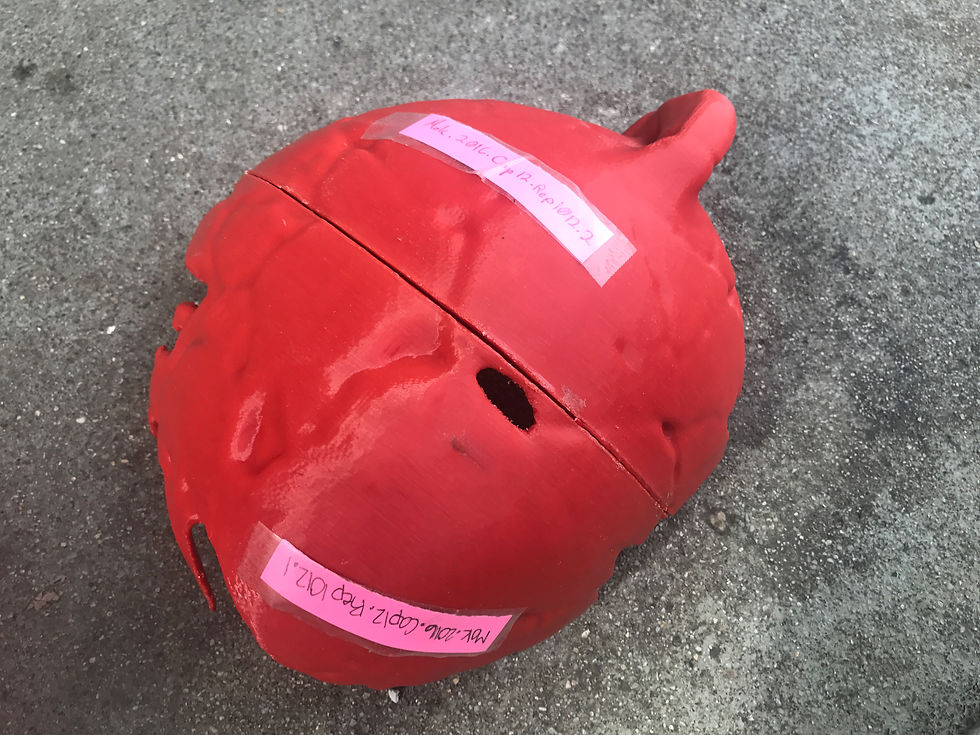
STEP THREE: PUTTING THE PIECES TOGETHER
I use acetone to put the pieces together. The acetone melts the ABS plastic, so that I can "glue" them together to make a permanent bond. You have to be careful to make sure that you put the pieces together correctly; it is easy to mix up the pieces, but the library workers have labeled all of mine so that I know what piece goes to what. I can also keep track of what vessels I've printed already.

STEP FOUR: FILLING THE HOLES
Unfortunately, there are often small gaps in the lines where the two pieces meet, and the acetone just won't fill the gaps. Because of this, I've purchased a 3D Pen and use the same ABS plastic (all from Amazon) to fill in the gaps. This is the best way that I've found as the first few pieces I had painted came out with obvious lines. They just didn't look good. I use a 3D Pen by Kuman.

STEP FIVE: SANDING THE PIECES
The printer I use makes the pieces rigid (they are printed in lines of plastic). Because of this, I sand down the entire surface before smoothing. You can use acetone to smooth if you'd like, but it takes a long time and it's difficult to judge when it is smooth enough. If it isn't smooth enough, then you'll still see the lines after painting. My early pieces are like this. I use a Dremel 7300 hobby sander, and it works great. It is cordless, so you'll have to be sure to charge the battery after using.
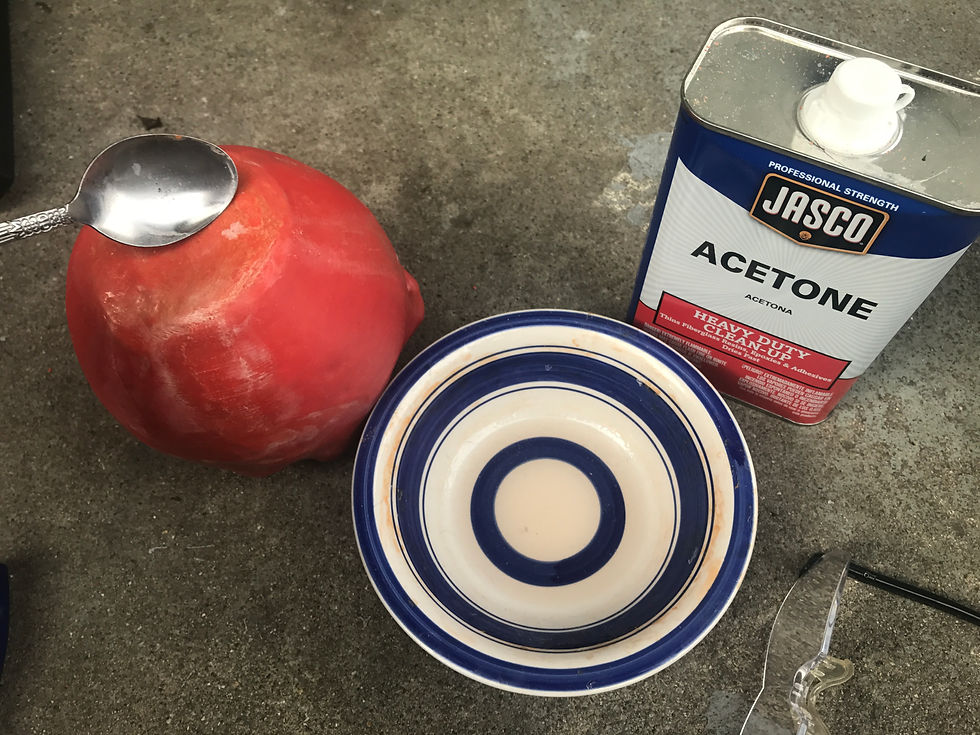
STEP SIX: SMOOTHING
Now you are ready to smooth the vessels. Using acetone is a quick and easy way to smooth them, so long as you've sanded them first. I simply pour a little acetone in a bowl, and then use a metal spoon to pour it on. The acetone is capable of eating right through the plastic, so be careful. I use my fingers to smooth the plastic out. It dries rather quickly, so if you keep smoothing you'll eventually get fingerprints in the plastic. Just add a bit more acetone. Hey...do you have a fingerprint on the original vessel? Here's your chance to add it.
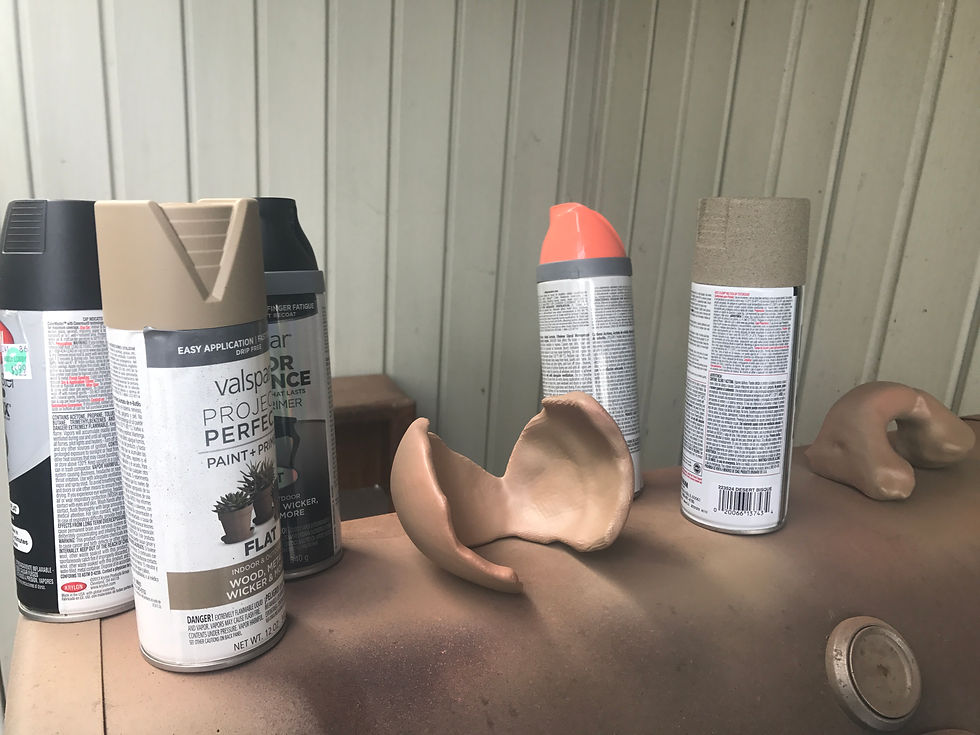
STEP SEVEN: PAINTING
The original vessels I have copied from have several distinct characteristics. First, they have an orange color to them. I have toyed with mixing the tan with the orange to attempt to get the exact color, but I've failed. Oh well. I have already taken a Munsell reading of the originals, so the colors I'm using are just for aesthetics. Second, many of my vessels were burnt. Because of this I have purchased both a charcoal black and a black paint, and I am toying with adding the burns. Of course, this won't be perfect, but they still look good. Lastly, I've also purchased a textured tan that I spray on from a distance just to add a bit more texture to the pieces. The originals were very crude, and most were not perfectly smoothed.
The Finished Project!
I have about forty pieces to print, so this will be a very time consuming, but calming, task. Here are the few pieces I've completed so far. You can see that some still contain the lines from before I learned to add the 3D Pen, and I'm sure you can find other mistakes. Nonetheless, this has been a rather fun adventure.
While the 3D prints aren't exactly perfect, this allows me to see hands-on what pieces I have. I can sort them by type, etc. How many pedestalled bowls do I have? How many
These pieces are from my dissertation site, so I have a pretty good reason to finish the project. Whatever reasons you might want to create 3D replicas of pottery, bullae, etc., I hope you have fun doing it.
Let me know if you're planning on doing this as I'd like to see your finished projects.


Comments